There’s something magical about biting into a cookie that just melts away—soft, buttery, with a refreshing hint of peppermint. That’s exactly what you get with my Peppermint Meltaway Cookies Recipe, a delightful treat that's perfect for cozy holiday moments or anytime you crave a little festive comfort.

Jump to:
Why You'll Love This Recipe
I can honestly say that this Peppermint Meltaway Cookies Recipe has become a holiday staple in my kitchen. It combines a unique melt-in-your-mouth texture with just the right peppermint kick. These cookies aren’t just delicious—they bring back sweet memories of festive gatherings.
- Unique Texture: The perfect blend of shortbread-like crumb and cakey softness that truly melts on your tongue.
- Easy to Make: Simple ingredients and straightforward steps mean you can whip these up even with a busy schedule.
- Customizable Flavor: That gentle peppermint note can be dialed up or down, plus you can add fun frosting and crushed candy canes.
- Perfect for Sharing: These cookies look as good as they taste, making them a hit at parties, gift boxes, or cozy nights in.
Ingredients & Why They Work
Each ingredient in the Peppermint Meltaway Cookies Recipe plays an essential role in building that tender, buttery texture with a delightful peppermint flavor. If you’re shopping, choosing quality vanilla and peppermint extracts amps up the cookie’s festive character beautifully.
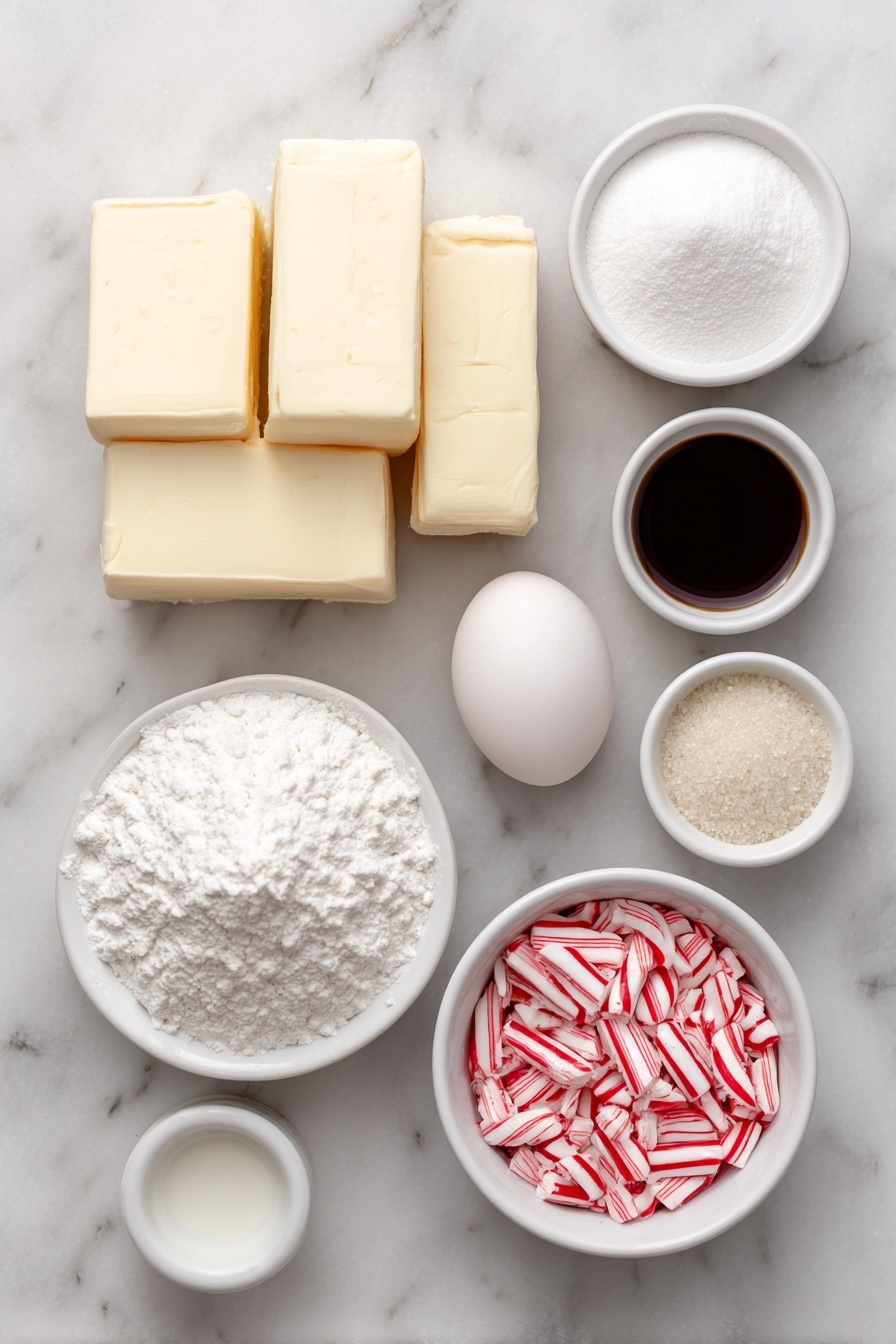
- Unsalted Butter: Room temperature butter is the star for creaminess and richness; it’s crucial for that meltaway feel.
- Confectioners’ Sugar: Gives the dough its fine, tender crumb and sweetness without grittiness.
- Egg Yolk: Adds moisture and richness without making the dough too wet.
- Pure Vanilla Extract: Balances and deepens the flavor for a warm undertone.
- Peppermint Extract: The festive punch that makes these cookies stand out—use sparingly for best results.
- All-Purpose Flour: Forms the cookie’s structure; spooning and leveling ensures you don’t overload the dough.
- Cornstarch: The secret weapon for added tenderness and that soft meltaway texture.
- Baking Powder: Just enough lift without changing the delicate texture.
- Salt: Enhances flavor and balances sweetness perfectly.
- Milk (for frosting): Helps achieve the perfect buttercream consistency, adjustable to your liking.
- Crushed Candy Canes: Adds festive crunch and a burst of peppermint candy flavor on top.
Make It Your Way
One of the things I love most about this Peppermint Meltaway Cookies Recipe is how easily it adapts to what you have on hand or your flavor preferences. I've tweaked mine over time to suit different occasions—and you can too!
- Variation: On some occasions, I’ve swapped peppermint extract for orange or almond extract to create a whole new cookie vibe, and it worked beautifully.
- Dietary Adjustments: For a dairy-free version, try using plant-based butter and milk alternatives—the cookies still turn out tender and delicious.
- Frosting Fun: If you prefer a drizzle instead of full frosting, melted white chocolate with a peppermint twist is a lovely alternative.
Step-by-Step: How I Make Peppermint Meltaway Cookies Recipe
Step 1: Cream the Butter and Sugar to Perfection
Start by beating the butter on medium speed until it’s creamy—about a minute. This step sets the foundation for that tender texture. Then add the confectioners’ sugar. Beat it first slowly to avoid a sugar cloud, then crank it up to medium-high and mix for two minutes until your bowl holds a light, fluffy mixture. Scrape the sides to keep everything even.
Step 2: Add Flavor & Combine the Dry Ingredients
Mix in the egg yolk, vanilla, and peppermint extracts on high speed until smooth and combined. In a separate bowl, whisk together the flour, cornstarch, baking powder, and salt. Slowly add these to your wet ingredients on low speed until the dough becomes thick and creamy. Remember—this dough is soft but quite firm, so no worries if it feels a bit dense at this stage.
Step 3: Chill the Dough for Best Results
Wrap the dough tightly and chill it in the fridge for at least 30 minutes. This step is non-negotiable because it helps the dough firm up, making it easier to handle and prevents the cookies from spreading too much in the oven.
Step 4: Shape and Bake with Care
Preheat your oven to 350°F (177°C), line baking sheets with parchment or silicone mats, and scoop dough into 1-tablespoon balls. Place them three inches apart to give them space to bake. Don't forget to gently flatten each ball with your palm to just under 2 inches wide—this little trick ensures a tender, delicate bite straight from your oven in about 13–14 minutes. The cookies shouldn't brown, so watch for edges to just set.
Step 5: Whip Up the Peppermint Buttercream
While the cookies cool completely on a rack, blend softened butter with confectioners’ sugar, milk, vanilla, and peppermint extract for a smooth, fluffy frosting. Adjust the thickness by adding more sugar or milk as you go. If you like a festive pop, add a drop of red or pink food coloring for a soft blush color.
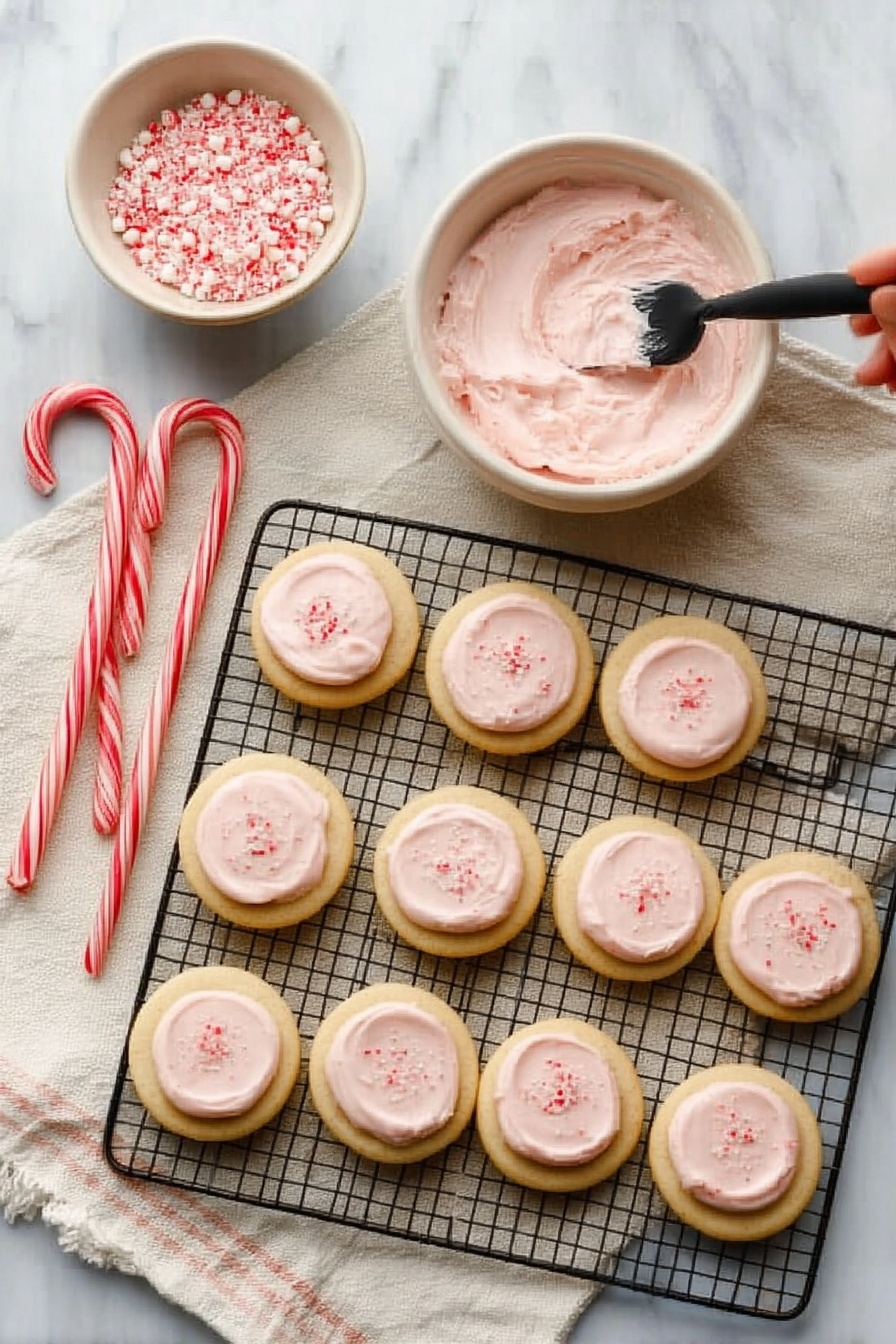
Step 6: Frost and Decorate
Use an icing spatula or a butter knife to spread that creamy frosting over your cooled cookies. Then sprinkle crushed candy canes on top for crunch and a burst of peppermint candy that makes these cookies extra special.
Top Tip
Over the years, I’ve learned that a few small techniques can make your Peppermint Meltaway Cookies Recipe truly shine. Trust me: these tips will save you from common pitfalls and guarantee a crowd-pleasing batch.
- Don’t Skip Chilling: The dough can be quite sticky, but chilling prevents spreading and helps create that hallmark meltaway texture.
- Use Room Temperature Ingredients: Butter and egg yolks that aren’t cold combine more smoothly, ensuring even texture and flavor.
- Flatten Dough Balls Gently: Press them just enough to spread slightly during baking—too flat and they become crispy, too thick and they won’t melt away.
- Watch Baking Time Closely: The cookies won't brown, so trust the feel of set edges and timing rather than color to avoid drying out.
How to Serve Peppermint Meltaway Cookies Recipe
Garnishes
I love topping these cookies with freshly crushed candy canes because they add a festive crunch and visual sparkle. Sometimes, I also drizzle a little melted dark or white chocolate for an extra touch of indulgence—just like a little gift for your taste buds.
Side Dishes
These cookies pair wonderfully with a warm cup of hot cocoa, peppermint tea, or even a classic eggnog. For a holiday party, I often include a variety of cheeses and fruit to balance the sweetness on the plate.
Creative Ways to Present
For festive gatherings, I arrange the cookies on a decorative platter lined with evergreen sprigs or place them in clear cellophane bags tied with bright ribbons—instant adorable gifts! You could also stack them with parchment paper in between for a charming cookie tower centerpiece.
Make Ahead and Storage
Storing Leftovers
After frosting, I keep leftover cookies in an airtight container in the fridge for up to 5 days. This helps maintain the frosting’s texture without making the cookies hard. Bringing them to room temperature before serving brings back their meltaway softness.
Freezing
I’ve had great success freezing unfrosted dough balls in a zip-top bag for up to 3 months. Then, just thaw in the fridge overnight before baking. You can also freeze baked, cooled cookies without frosting—just thaw and frost fresh before serving.
Reheating
If you want to refresh leftover cookies, a few seconds in a microwave or a 5-minute warm-up in the oven at low heat works wonders to soften them back up without melting the frosting.
Frequently Asked Questions:
You can, but peppermint oil is much more concentrated than extract, so use only a very small amount—start with just a drop—to avoid overpowering the cookies. Peppermint extract is usually easier to manage for even flavor.
Chilling firms up the dough, making it easier to handle and preventing the cookies from spreading too much while baking. It also helps develop better flavor and texture, giving those signature meltaway qualities.
Absolutely! These cookies are delicious on their own with their subtle sweetness and peppermint flavor. Frosting just adds a creamy layer of indulgence and a way to add crushed candy canes for texture.
If your cookies spread more than expected, make sure your butter was properly chilled before mixing and that you measured your flour correctly. Sometimes slightly flattening the dough balls too much before baking can also cause extra spreading, so stick to the recommended size.
Final Thoughts
This Peppermint Meltaway Cookies Recipe has such a special place in my heart—it’s one of those recipes I reach for when I want to spread a little holiday cheer or indulge in a quiet moment. I hope you’ll enjoy making and sharing these melt-in-your-mouth treats as much as I do. Trust me, once you try them, you’ll be baking these every festive season (and maybe beyond!).
Print
Peppermint Meltaway Cookies Recipe
- Prep Time: 1 hour
- Cook Time: 14 minutes
- Total Time: 1 hour 30 minutes
- Yield: 30 cookies
- Category: Dessert
- Method: Baking
- Cuisine: American
- Diet: Vegetarian
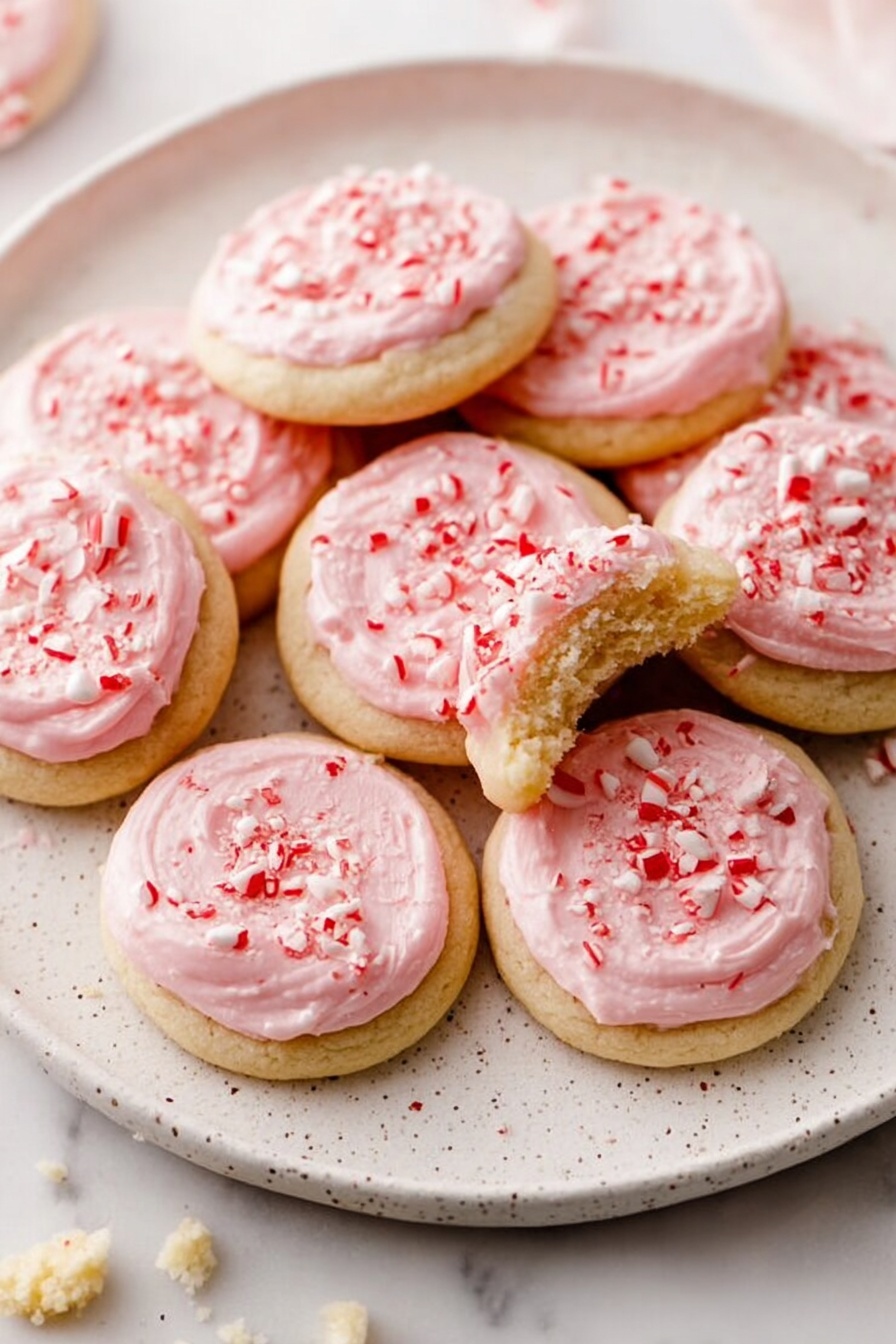
Description
Peppermint Meltaway Cookies are soft, buttery, and sweet treats perfect for the holiday season. Their unique texture is a delightful cross between shortbread and cakey cookies, melting in your mouth with every bite. Flavored with peppermint and adorned with crushed candy canes, these festive cookies are a must-bake for the holidays.
Ingredients
Cookie Dough
- 1 cup (16 Tbsp; 226g) unsalted butter, softened to room temperature
- ⅔ cup (80g) confectioners’ sugar
- 1 egg yolk, at room temperature
- 1 teaspoon pure vanilla extract
- ½ teaspoon peppermint extract
- 2 cups (250g) all-purpose flour (spooned & leveled)
- ¼ cup (30g) cornstarch
- 1 teaspoon baking powder
- ¼ teaspoon salt
Frosting
- 6 Tablespoons (85g) unsalted butter, softened
- 1 and ½ cups (180g) confectioners’ sugar
- 1–2 Tablespoons milk, at room temperature (dairy or nondairy)
- ½ teaspoon pure vanilla extract
- ¼ teaspoon peppermint extract
- Optional: 1 drop red or pink food coloring
- ¼ cup (40g) crushed candy canes (about 2–3 large candy canes)
Instructions
- Cream the Butter and Sugar: In a large bowl using a handheld or stand mixer fitted with a paddle attachment, beat the butter on medium speed until creamy, about 1 minute. Add the confectioners’ sugar and beat on low speed for 30 seconds, then increase to medium-high speed and beat for 2 full minutes until light and fluffy. Scrape down the sides and bottom of the bowl as needed.
- Add Wet Ingredients: Add the egg yolk, vanilla extract, and peppermint extract and beat on high speed until combined. Scrape down the bowl again if needed.
- Mix Dry Ingredients: Add the flour, cornstarch, baking powder, and salt to the wet ingredients. Beat on low speed until the dough is thick, creamy, and fully combined.
- Chill the Dough: Cover the dough tightly and refrigerate for at least 30 minutes or up to 3 days. This chilling step is mandatory to achieve the perfect texture.
- Preheat and Prepare Baking Sheets: Preheat the oven to 350°F (177°C). Line large baking sheets with parchment paper or silicone baking mats and set aside.
- Shape the Cookies: Scoop and roll the dough into balls about 1 tablespoon (20–22g) each. Place them 3 inches apart on the baking sheets and flatten slightly with the palm of your hand to just under 2 inches in diameter.
- Bake: Bake the cookies for 14 minutes or until the edges appear set. Do not over-bake as the cookies will not brown visibly.
- Cool Cookies: Remove cookies from the oven and allow them to cool on the baking sheet for 10 minutes, then transfer to a cooling rack to cool completely before frosting.
- Prepare Frosting: Using a mixer fitted with a paddle attachment, beat softened butter on medium speed until creamy, about 1 minute. Add confectioners’ sugar, milk, vanilla extract, and peppermint extract. Beat on low speed for 30 seconds, then increase to medium-high speed and beat for 2 minutes until light and fluffy. Adjust thickness by adding more confectioners’ sugar to thicken or more milk to thin. Add a pinch of salt to balance sweetness if desired.
- Color the Frosting (Optional): Beat in 1 drop of red or pink food coloring to tint the frosting, adding more drops if a deeper color is desired.
- Frost and Decorate: Spread the frosting evenly onto the cooled cookies using a knife or icing spatula. Lightly sprinkle crushed candy canes on top of each frosted cookie.
- Store: Cover and store frosted cookies at room temperature for up to 1 day or refrigerate for up to 5 days. The frosting will softly set after a few hours, drying slightly on top.
Notes
- Chilling the dough for at least 30 minutes is crucial to achieve the delicate meltaway texture.
- Cornstarch and confectioners’ sugar are key ingredients to the unique soft texture; do not substitute with granulated sugar.
- Flattening the dough balls slightly before baking helps them bake evenly and maintain the perfect shape.
- Be careful not to overbake as these cookies do not brown and can become dry if left too long in the oven.
- The frosting can be adjusted for sweetness and thickness by varying confectioners’ sugar and milk quantities.
- Use crushed candy canes fresh for the best texture and flavor to decorate the cookies.
- These cookies combine the buttery richness of shortbread with a light, cakey texture for a unique dessert experience.
Nutrition
- Serving Size: 1 cookie
- Calories: 150 kcal
- Sugar: 10 g
- Sodium: 70 mg
- Fat: 9 g
- Saturated Fat: 5 g
- Unsaturated Fat: 3 g
- Trans Fat: 0 g
- Carbohydrates: 16 g
- Fiber: 0.5 g
- Protein: 1 g
- Cholesterol: 20 mg


Leave a Reply