There's something truly comforting about biting into a rich, dense chocolate brownie, especially when it's also gluten-free and made with wholesome almond flour. This Fudgy Almond Flour Gluten-Free Brownies Recipe brings that perfect fudgy texture with a shiny crackly top that’ll have you coming back for more—and no one will guess it’s gluten-free!

Jump to:
- Why You'll Love This Recipe
- Ingredients & Why They Work
- Make It Your Way
- Step-by-Step: How I Make Fudgy Almond Flour Gluten-Free Brownies Recipe
- Top Tip
- How to Serve Fudgy Almond Flour Gluten-Free Brownies Recipe
- Make Ahead and Storage
- Frequently Asked Questions:
- Final Thoughts
- Fudgy Almond Flour Gluten-Free Brownies Recipe
Why You'll Love This Recipe
I honestly didn’t expect to fall so hard for a gluten-free brownie until I made this recipe. It nails that balance of fudgy and slightly cakey with a glossy, crackly top that’s so inviting. Plus, it’s simple enough to whip up anytime you want a treat without fuss.
- Perfect fudgy texture: Thanks to almond flour and coconut oil, these brownies stay moist and melt-in-your-mouth.
- Gluten-free & allergy-friendly: No wheat, no dairy needed—great for many dietary needs.
- Easy to make: Just one bowl, straightforward steps, and pantry-friendly ingredients.
- Customizable: I’ll share how to mix things up to suit your taste or whatever you have on hand!

Ingredients & Why They Work
Every ingredient in this recipe plays a role to create that decadent fudgy texture and deep chocolate flavor. Almond flour keeps it moist without gluten’s structure, while coconut oil adds richness and a subtle aroma. I like to use unsweetened cocoa for that pure chocolate hit, and coconut sugar for a hint of caramel sweetness.

- Semi-sweet or dark chocolate chips: Choose dairy-free if needed; melting these creates your rich brownie base.
- Coconut oil: Adds moisture and richness; you can sub butter or vegan butter if you prefer.
- Coconut sugar: Slightly less sweet, with a caramel note that pairs beautifully with chocolate.
- Eggs: Bind everything together and help create the shiny, crackly top.
- Vanilla extract: Enhances chocolate flavor and adds warmth.
- Almond flour: Finely ground blanched almond flour delivers that gluten-free structure and buttery flavor.
- Unsweetened cocoa powder: Provides deep, intense chocolate taste without added fat.
- Baking powder: Gives a little lift without making brownies cakey.
- Kosher salt: Balances sweetness and amplifies chocolate flavor.
- Additional chocolate or nuts: Mix-ins add delightful texture contrasts; I often add chocolate chunks for extra gooey pockets.
Make It Your Way
I love tweaking this Fudgy Almond Flour Gluten-Free Brownies Recipe depending on my mood or what’s in my pantry. You can easily add nuts, swap oils, or even toss in some espresso powder for a mocha twist. It’s your playground!
- Variation: One time, I swapped half the chocolate chips for chopped walnuts and it added such a satisfying crunch—it was an instant favorite around my kitchen.
- Lower sugar: You can dial down the coconut sugar slightly. Just remember, this might affect that shiny top.
- Vegan version: Try replacing eggs with flax eggs and use vegan chocolate chips—results can vary but still tasty!
- Spiced brownies: Add a pinch of cayenne or cinnamon to spice it up a bit.
Step-by-Step: How I Make Fudgy Almond Flour Gluten-Free Brownies Recipe
Step 1: Preheat and Prep
Get your oven heating to 350°F and line an 8x8-inch metal baking pan with parchment paper or give it a good spritz of nonstick spray. This step ensures easy removal later—I always run a knife around the edges after cooling for perfect slices.
Step 2: Melt Chocolate and Oil
In a small saucepan over low heat, gently melt your chocolate chips and coconut oil together. Stir consistently until glossy and smooth, then set aside to cool just a bit. Don’t skip cooling; too hot and you risk scrambling your eggs later.
Step 3: Whisk Eggs and Sugar
In a large bowl, whisk your coconut sugar and eggs vigorously for 2–3 minutes until the mixture lightens and flows in thick ribbons when you lift the whisk. This step is key for that irresistible glossy top texture—don’t rush it! I sometimes set a timer to make sure I get this right.
Step 4: Combine Dry Ingredients
In a separate bowl, whisk together your almond flour, cocoa powder, baking powder, and salt. This ensures everything is evenly distributed for a consistent texture.
Step 5: Mix It All Together
Pour your melted chocolate and oil mixture into the egg-sugar bowl, stirring to combine smoothly. Add vanilla extract and stir again. Then fold in the dry ingredients just until you no longer see dry bits. Over mixing can toughen brownies, so stop once mixed.
Step 6: Add Mix-Ins and Bake
Fold in your additional chocolate chips or nuts, reserving a few to sprinkle on top. Pour the batter into your pan and smooth it out. Bake for 18–20 minutes until the edges are set but the center is slightly underdone—this is what keeps the brownies super fudgy.
Step 7: Cool and Slice
Sprinkle flaky sea salt over the top if using, and let the brownies cool completely on a wire rack before slicing. For the neatest cuts, I pop the pan in the fridge for 30 minutes—trust me, it’s worth it!
Top Tip
Over the years making this recipe, I’ve learned a few tricks that really take the brownies to the next level. Implementing these will help you nail that luscious fudginess and beautiful shiny top every time.
- Don’t Rush the Egg Whisking: Make sure you whisk eggs and sugar until the mixture is lighter and can hold ribbons. This is key for the classic brownie top texture.
- Cool Your Melted Chocolate: Avoid adding molten hot chocolate to eggs or you risk curdling. Let it cool briefly before mixing.
- Check Your Bake Time: Pull brownies out when the edges set but center is still slightly soft — remember the brownies continue cooking as they cool.
- Chill Before Slicing: For the cleanest slices, cool completely and pop the brownies in the fridge before cutting.
How to Serve Fudgy Almond Flour Gluten-Free Brownies Recipe

Garnishes
I love sprinkling flaky sea salt on top right after baking—it creates that irresistible sweet-and-salty combo. Sometimes, I dust them lightly with powdered sugar or add a drizzle of caramel sauce for a fancy twist when guests come over.
Side Dishes
These brownies pair beautifully with a scoop of vanilla bean ice cream or a dollop of coconut whipped cream for extra indulgence. Fresh berries on the side add a nice pop of freshness that balances the richness.
Creative Ways to Present
For gatherings, I’ve served these brownies stacked on a wooden board with rustic parchment and a little bowl of berries and whipped cream so guests can help themselves. For holidays, a dusting of edible gold flakes elevates them into something truly special.
Make Ahead and Storage
Storing Leftovers
Leftover brownies store well at room temperature in an airtight container for 1-2 days. I usually cover mine with parchment paper between layers to keep them from sticking, then cover the container tightly.
Freezing
If I want to stash extras, I freeze them individually wrapped in parchment and foil. They keep beautifully for up to two months and thaw quickly at room temp—so convenient for sudden cravings.
Reheating
To enjoy brownies warm, I pop them in the microwave for about 15 seconds or briefly heat them in a 300°F oven wrapped in foil. This refreshes that gooey texture without drying them out.
Frequently Asked Questions:
Almond flour is key here because it provides moisture and a tender crumb that other gluten-free flours often can’t. If you substitute, expect a different texture—something a bit drier or crumbly. If you must substitute, try a gluten-free blend with xanthan gum, but know the brownies won’t be quite as fudgy.
Whisking eggs and sugar until light and ribboning incorporates air, which helps create the glossy, crackly top and a tender texture inside. Skipping or rushing this step can result in brownies that are flat and dense.
Look for set edges and a center that’s still slightly underdone and soft to the touch. A toothpick inserted should come out with just a few moist crumbs. This ensures they stay fudgy and don’t dry out once cooled.
Yes! Using dairy-free chocolate chips and coconut oil keeps this recipe completely dairy-free. Just double-check your vanilla extract and any additional mix-ins to ensure they’re also free of dairy ingredients.
Final Thoughts
This Fudgy Almond Flour Gluten-Free Brownies Recipe is a gem I’m so glad to have found—it’s both reliable and indulgent, perfect for when you want to treat yourself without the gluten or dairy. I hope you enjoy making (and eating!) these as much as I do. Trust me, once you try them, these brownies will become a staple in your dessert lineup.
Print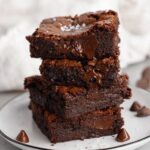
Fudgy Almond Flour Gluten-Free Brownies Recipe
- Prep Time: 15 minutes
- Cook Time: 25 minutes
- Total Time: 40 minutes
- Yield: 16 servings
- Category: Dessert
- Method: Baking
- Cuisine: American
- Diet: Gluten Free
Description
These perfect gluten-free brownies are fudgy, rich, and made with almond flour and dairy-free chocolate, offering a delicious grain-free and dairy-free treat that everyone will enjoy. They feature a crackly top and are easily customizable with mix-ins and an optional sprinkle of flaky sea salt.
Ingredients
Main Ingredients
- ⅔ cup semi-sweet or dark chocolate chips (dairy-free, if needed)
- 5 Tablespoons coconut oil (can substitute butter, avocado oil, vegan butter)
- ⅔ cup coconut sugar (can substitute white or brown sugar)
- 2 large eggs
- 1 teaspoon vanilla extract
Dry Ingredients
- ⅔ cup finely ground blanched almond flour
- 2 Tablespoons unsweetened cocoa powder
- ½ teaspoon baking powder
- ¼ teaspoon kosher salt
Mix-Ins & Garnish
- ⅔ cup additional chocolate chips or chopped chocolate (can substitute nuts)
- Optional: flaky sea salt to sprinkle on top (like Maldon)
Instructions
- Preheat Oven & Prep The Pan: Preheat your oven to 350 degrees Fahrenheit. Line an 8x8 inch metal square pan with parchment paper or spray it with nonstick spray to ensure easy removal of the brownies.
- Melt Chocolate: In a small saucepan, gently melt the chocolate chips together with the coconut oil over low heat until the mixture is smooth and glossy. Remove from heat and let it cool slightly to avoid cooking the eggs in the next step.
- Beat Eggs & Sugar: In a large bowl, whisk the eggs and coconut sugar together for 2 to 3 minutes until the mixture lightens in color and reaches the ribbon stage—when lifted with a whisk, the batter falls back in ribbons. Check texture by rubbing a bit between your fingers; it should not feel gritty.
- Combine Dry Ingredients: In a separate medium bowl, whisk together almond flour, cocoa powder, baking powder, and kosher salt until evenly mixed.
- Combine Wet & Dry Mixtures: Pour the melted chocolate mixture into the egg and sugar mixture, stirring until smooth. Add the vanilla extract and stir to combine. Fold in the dry ingredients gently until just incorporated to avoid overmixing.
- Add Mix-Ins: Fold in the additional chocolate chips or chopped chocolate, reserving some to sprinkle on top of the batter in the pan for a decorative touch.
- Bake: Pour the batter into the prepared pan and smooth the surface. Sprinkle with the reserved chocolate chips. Bake for 20 minutes, or until the edges are set and the center is slightly underdone. A toothpick inserted in the center should come out with a few moist crumbs.
- Garnish & Cool: If desired, sprinkle coarse sea salt on top of the warm brownies. Let them cool completely on a wire rack. For neater slicing, chill the brownies before cutting.
- Storage Tips: Store leftovers in an airtight container at room temperature for 1 to 2 days, refrigerate for 3 to 4 days, or freeze for up to 2 months to maintain freshness.
Notes
- These fudgy almond flour brownies are so delicious that no one will guess they are gluten-free, dairy-free, and grain-free.
- To ensure the glossy and crackly top, do not rush the egg and sugar whisking step; it's crucial for the texture.
- You can substitute additional chocolate chips with chopped nuts for a different texture.
- Chilling the brownies before slicing makes for cleaner, neater pieces.
- Use parchment paper lining to prevent sticking and make removal easier.
Nutrition
- Serving Size: 1 square
- Calories: 176 kcal
- Sugar: 18.7 g
- Sodium: 90.7 mg
- Fat: 10.3 g
- Saturated Fat: 7.1 g
- Unsaturated Fat: 3.2 g
- Trans Fat: 0 g
- Carbohydrates: 20.5 g
- Fiber: 1.6 g
- Protein: 2.3 g
- Cholesterol: 23.3 mg


Leave a Reply